Adding All Columns In A Table To A Query [Easy]

Facebooktwitterredditpinterestlinkedinmail

I wanted to share this quick tip with you on how to add a list of all the columns in a table to your query window in SQL Server Management Studio. This is the easiest way I know!

  1. Expand the Object Explorer to show the table that you want to add the columns for.
        Adding All Columns 1
  2. Select the Columns folder on to your query window.
        Adding All Columns 2
  3. Drag the whole folder on to your query window and just drop it where you want it. That’s it!
    Adding All Columns 3

SQL Server Management Studio Dark Theme

Facebooktwitterredditpinterestlinkedinmail

If you like the dark theme of Visual Studio and wish that you had the dark theme for SQL Server Management Studio (SSMS), look no further.  Management Studio actually comes with a dark theme, but it just isn’t enabled.  It’s super simple to enable this feature.  Here’s how.

Note: I’ve confirmed this works with SQL Server 2016.

Here is what my current themed Management Studio looks like:
SQL Server Management Studio Dark Theme Light


The place in SQL Server Management Studio that we set the color theme is in the Options.  To see what we currently have, you go to the options by clicking Tools –> Options…
SQL Server Management Studio Dark Theme Options

From there we navigate to Environment –> General.  On the right side we can see Color theme:.  This option shows the current color theme that you are SSMS is using.
SQL Server Management Studio Dark Theme Options

My only options in the drop-down are Blue and Light:
SQL Server Management Studio Dark Theme Options

To allow the Dark theme to be selected, all we need to do is make a small change to the ssms.pkgundef file.  This file is located at: “C:\program files (x86)\Microsoft SQL Server\130\tools\binn\managementstudio\ssms.pkgundef”.


Step 1) Close SQL Server Management Studio and then browse to the ssms.pkgundef file and open it with Notepad.  The easiest way I found is to right click on the file and choose Edit.

TIP: If you can’t save the file after editing it, you may need to launch Notepad as administrator.

SQL Server Management Studio Dark Theme Edit

Step 2) Find the // Remove Dark theme key.  The easiest way is to just do a search in Notepad.
SQL Server Management Studio Dark Theme Edit

Step 3) Add 2 slashes (//) in front of this key that starts with [$RootKey$\Themes\.  Save and close the file.
SQL Server Management Studio Dark Theme Edit

Step 4) Relaunch SQL Server Management Studio.  Go back in to the options and select the Dark theme.
SQL Server Management Studio Dark Theme Done

This is what your final product should look like!  Enjoy!
SQL Server Management Studio Dark Theme Dark


5 Quick Tips For Using SQL Server Management Studio

Facebooktwitterredditpinterestlinkedinmail

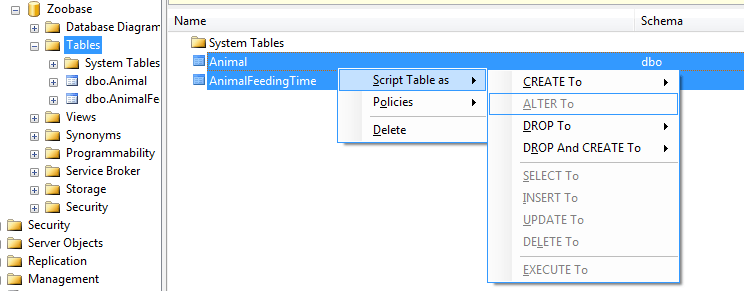
1) Script multiple objects by using the Object Explorer Details.

Scripting objects like tables and stored procedures is one great feature of SQL Server Management Studio.  But the way to script multiple tables at one time is not very straight forward.

To script multiple objects, first thing you need to do is open the Object Explorer Details window.  This is located under the VIEW menu at the top of the screen.

Object Explorer Details

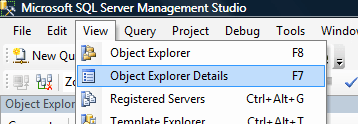
When you click on an object’s folder (Tables, Stored Procedures, Views, etc) in the Object Explorer (located on the left of the screen), the Object Explorer Details window will show all of the available tables.  You can now highlight multiple objects… then right click and select the Script As option.

SQL Server Object Explorer-details-window-script


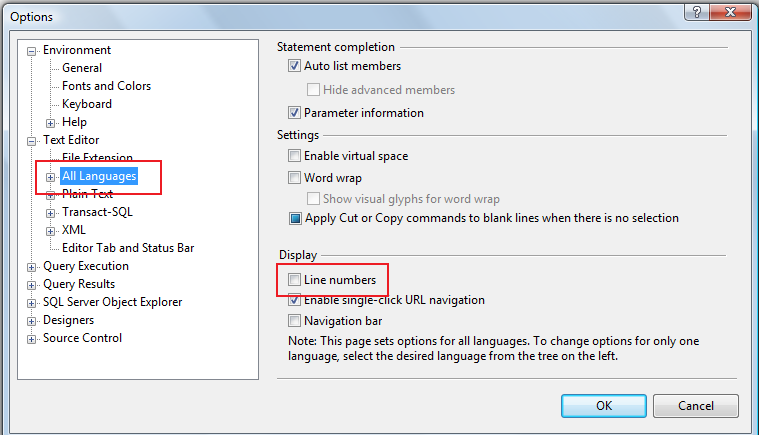
2) Add Line Numbers To The Query Window

Line numbers can be very useful when doing development.  By default, SQL Server Management Studio has this turned off.  To turn this on:

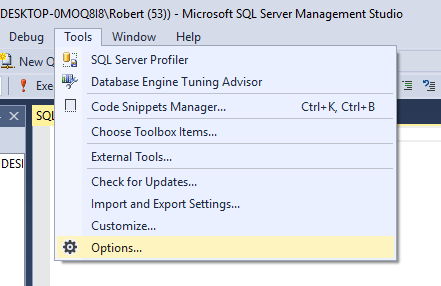
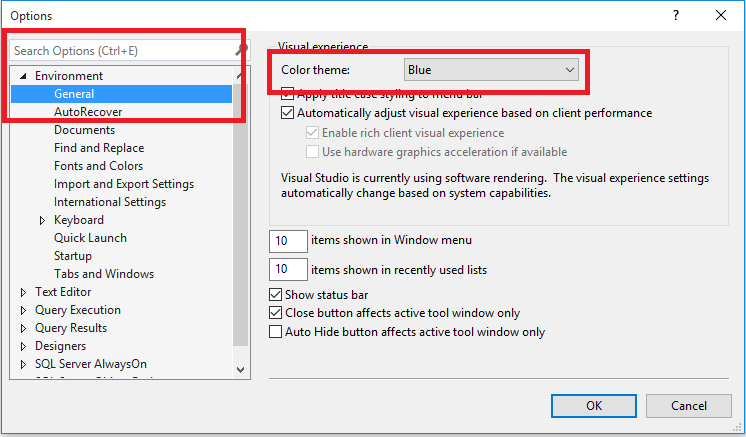
  1. Select Tools -> Options
  2. In the tree on the left, select Text Editor -> All Languages. Under the Display heading, check the box for Line numbers.

Enable Line Numbering


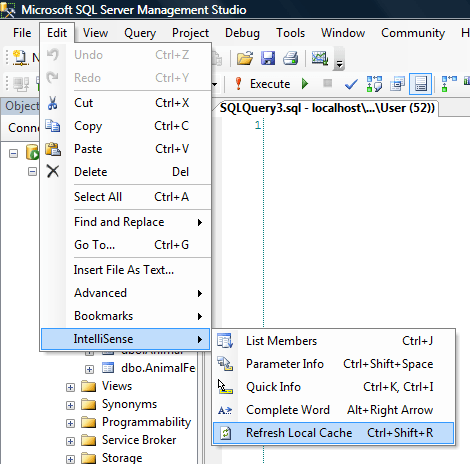
3) How To Refresh The IntelliSense Cache

If you’ve ever added a table or stored procedure, you know that the IntelliSense does not know about it.  You can refresh the cache pretty easily.  To refresh the IntelliSense cache, just selecting Edit -> IntelliSense -> Refresh Local Cache.

SQL Server IntelliSense Refresh Cache


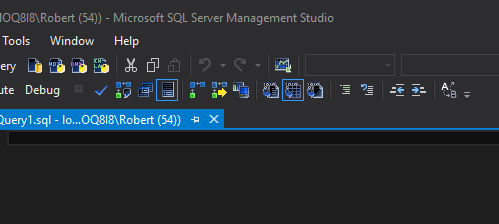
4) Highlight Columns Of Text In Query Window

This trick actually works in Visual Studio also.  You can highlight and manipulate text in different rows without having to highlight the entire row.  This is a little hard to explain, so I will show you pictures of what I mean.

Query Highlight Columns

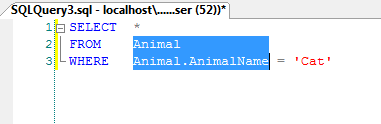
To do this fancy trick, all you need to do is hold down the ALT key while you click and drag.

So, how is this useful you ask… good question.  I use it for 2 different things.

  • First is for aligning the sql statement. If you highlight text you can just hit tab and it will tab the highlighted text in more.
  • The second thing I use it for is copying data. If you only want to pull out a specific set of data, this is super easy.


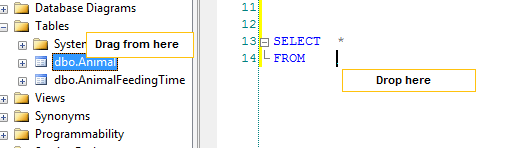
5) Drag And Drop Objects On To Query Window

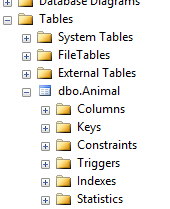
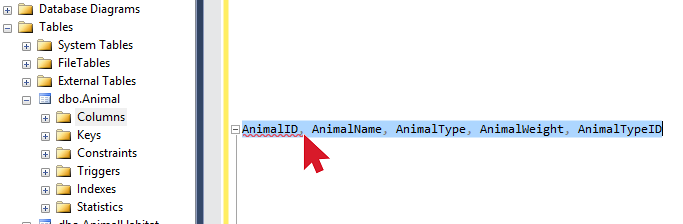
If you ever want a fast way to place a table name, column name, or other object in to a query… you can just drag and drop.  Just drag the object (table, column, store procedure, etc…) from the object browser and place it where you want it on the query window.  It will insert the fully qualified name in to the query with no typing needed.

Drag-Drop Objects